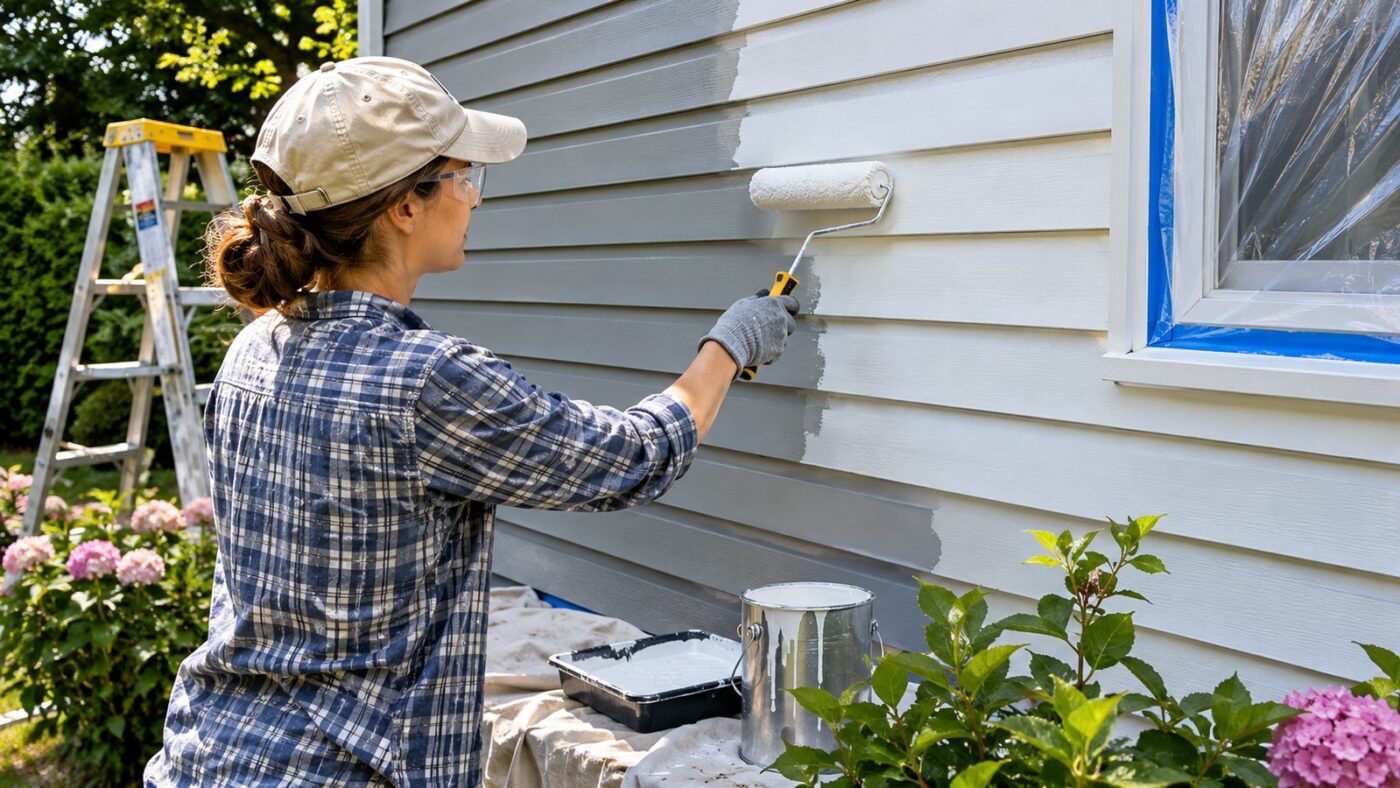
Repainting aluminum siding can restore a faded exterior without the cost and disruption of full replacement. The best results depend more on preparation than painting speed. Clean panels, sound repairs, proper primer, and exterior acrylic paint create a stronger finish. Direct answer: Start by inspecting and thoroughly cleaning the siding, then remove loose paint and repair damaged areas. Prime bare or weathered metal with a compatible exterior metal primer. Finish with two thin coats of quality exterior acrylic paint during mild, dry weather.
| Key point | Practical guidance |
|---|---|
| Best reason to repaint | Siding is structurally sound but faded, chalky, or dated |
| Main preparation task | Remove dirt, oxidation, mildew, and loose coating |
| Primer | Use a product specifically approved for aluminum or exterior metal |
| Finish paint | Quality exterior 100% acrylic paint is a common choice |
| Number of coats | Usually two thin finish coats |
| Best conditions | Dry, mild weather within the coating maker’s temperature limits |
| Replace instead when | Panels are badly damaged, loose, punctured, or failing extensively |
Key Takeaways
* Repainting works best when the existing panels remain structurally sound. * Chalky oxidation must be removed before new coatings are applied. * Bare aluminum usually needs an appropriate metal or bonding primer. * Two thin finish coats generally perform better than one heavy coat. * Older U.S. homes may require lead-safe practices before sanding or scraping. * Paint improves appearance, but it will not hide major dents or structural problems.
Should You Paint or Replace the Siding?
Painting makes sense when the existing exterior still performs well. Fading, chalking, and an outdated color do not automatically require replacement. A sound metal surface can often accept a new coating after careful preparation. Replacement deserves consideration when panels have widespread holes, severe dents, loose sections, or major installation problems. Paint cannot correct movement, trapped moisture, or missing pieces. Repairing isolated damage before painting often offers a better middle ground. A broader exterior plan can also influence the decision. New windows, trim, and other visible improvements can change how a siding color looks. Newsparq’s coverage of glazed-window home improvements can help when planning several exterior upgrades together.
What You Need Before Starting
Gathering supplies first helps keep each wall moving from preparation through coating. Choose products that specifically list aluminum or suitable exterior metal surfaces. Always follow the primer and paint manufacturer’s instructions for drying and recoating. Typical supplies include the following.
* Mild exterior cleaner. * Soft-bristle cleaning brush. * Garden hose. * Paint scraper. * Fine or medium sandpaper. * Exterior patching material suitable for metal. * Painter’s tape. * Drop cloths. * Exterior metal or bonding primer. * Quality exterior acrylic paint. * Brushes and rollers. * Ladder and suitable fall protection. * Gloves and eye protection.
Avoid buying paint based on color alone. The coating must be compatible with the prepared surface and primer. A paint retailer can confirm whether the selected system suits exterior aluminum.
Repainting Aluminum Siding in 7 Steps
1. Inspect the Entire Exterior
Walk around the house before washing or scraping anything. Look for loose panels, dents, holes, peeling coatings, mildew, and powdery residue. Mark areas needing repairs so they are not overlooked later. Rub a clean cloth or hand across several faded areas. A powdery residue usually indicates chalking from the aging factory finish. New paint needs a clean, stable surface beneath it. Also check caulk around penetrations, trim, and adjoining materials. Failed joints can allow moisture behind the exterior. Correct those problems before applying a cosmetic finish.
2. Check Older Homes for Lead-Paint Risk
Extra precautions matter when the home was built before 1978. The U.S. government banned residential consumer lead paint in 1978. Renovation activities can create hazardous dust when older lead-containing coatings are disturbed. EPA recommends determining whether lead-based paint is present before disturbing painted surfaces. Professional contractors working on covered pre-1978 properties must follow applicable lead-safe requirements. Homeowners doing their own work should also use EPA-recommended lead-safe practices. Do not aggressively sand or scrape a questionable old coating before assessing that risk. A certified inspector or lead-safe contractor can provide appropriate testing and guidance. This step matters most when earlier paint layers are already peeling.
3. Wash Away Dirt and Chalk
Thorough cleaning is one of the most important stages of the job. Paint applied over chalk, grime, mildew, or loose residue may lose adhesion. Scrub dirty areas with a suitable cleaner and soft brush. Rinse the surface completely after washing. Avoid directing high-pressure water upward beneath overlapping panels. Water forced behind the siding can create moisture problems inside the wall assembly. Allow the exterior to dry fully before moving forward. Damp seams and shaded areas may need more drying time. Painting trapped moisture into the system can shorten coating life.
4. Scrape, Sand, and Repair Problem Areas
Remove peeling or poorly bonded paint with controlled scraping. Feather rough coating edges with sandpaper so they do not remain visible. You usually do not need to remove every sound factory-coated area. Repair small holes and damaged sections with materials designed for exterior metal. Follow the repair product’s curing instructions before sanding or priming. Replace panels that cannot be repaired securely. Paint follows the shape beneath it rather than hiding defects. Large dents may remain visible after coating, especially under glossy finishes. A satin or low-luster finish can make minor imperfections less noticeable.
5. Prime the Areas That Need It
Bare aluminum and heavily weathered areas should receive a compatible exterior metal primer. The selected product should clearly state that it works on aluminum. Manufacturer instructions should determine preparation, application thickness, and drying time. Some sound previously coated surfaces may only require spot priming. Other weathered exteriors can benefit from broader primer coverage. The condition of the existing coating should guide that choice. Do not assume every general-purpose primer will bond correctly. Aluminum develops an oxide layer that affects coating adhesion. Current painting guidance consistently emphasizes using primers intended for metal or difficult exterior surfaces.
6. Apply the First Finish Coat
Use a quality exterior acrylic coating approved for the prepared surface. Start at the top and work downward to control drips. Maintain a wet edge so adjacent sections blend together. Follow the direction of the panels while rolling or brushing. Apply a thin, even coat rather than trying to achieve full coverage immediately. Heavy coats can dry unevenly and create runs. Work out of intense direct sunlight whenever possible. A hot metal surface can make paint dry faster than intended. Stay within the temperature and weather limits printed on the product label.
7. Add a Second Coat and Inspect the Finish
Allow the first coat to dry for the manufacturer’s full recommended period. Check the wall for drips, thin spots, debris, or rough areas. Correct those defects before the final coat. Apply the second coat using the same direction and controlled thickness. Two thin coats usually create more uniform color and coverage than one heavy application. Current aluminum-painting guides commonly recommend this two-coat approach. Inspect the completed work from several angles after drying. Different sunlight can reveal missed edges or uneven sections. Keep leftover labeled paint for future touch-ups.
Choose the Right Weather for Painting
Dry, moderate weather gives exterior coatings a better chance to cure correctly. Avoid starting when rain, heavy dew, or extreme temperatures threaten the coating window. Product labels provide the final temperature and recoat requirements. Direct midday sunlight can heat metal well above the surrounding air temperature. Work on shaded walls when practical and follow the shade around the house. This approach helps prevent paint from setting too quickly. Weather planning also makes other home projects easier. Seasonal maintenance may include cooling equipment before summer temperatures rise. Newsparq’s air-conditioning maintenance guide covers another part of keeping a home ready for warm weather.
Common Mistakes That Cause Peeling
The most common failures usually begin below the final paint layer. Poor cleaning leaves unstable chalk between the old finish and new coating. Skipping preparation can turn an expensive paint purchase into a short-lived repair. Watch for these mistakes.
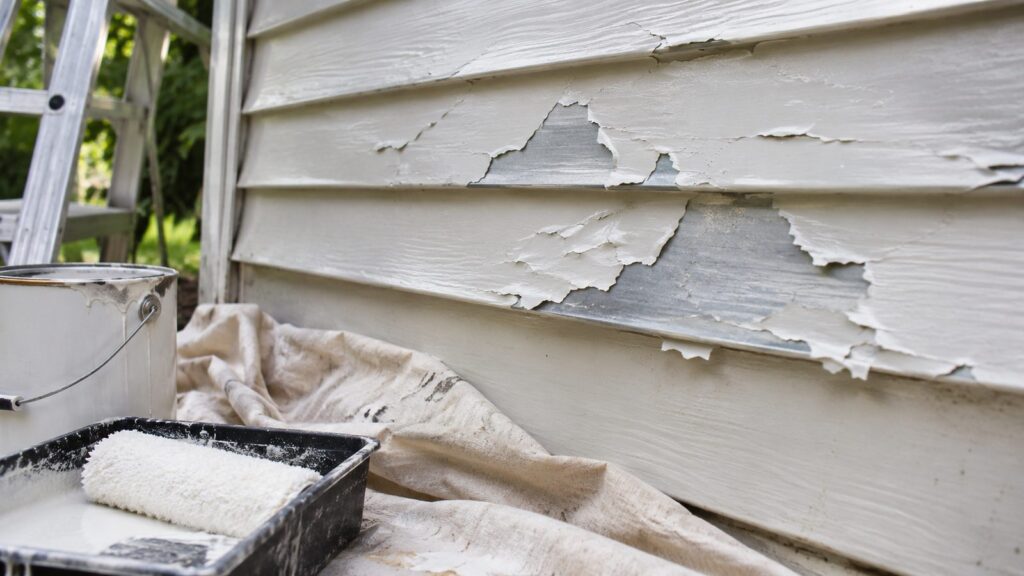
* Painting over chalky residue. * Leaving loose paint in place. * Coating damp panels. * Using a primer not approved for aluminum. * Applying one excessively heavy coat. * Painting a sun-heated wall. * Ignoring damaged or loose panels. * Sanding questionable pre-1978 coatings without lead precautions.
Rushing drying times can cause problems too. Primer and paint may feel dry before they are ready for another coat. Follow stated recoat times rather than judging by touch alone.
How Long Can a Repaint Last?
A properly prepared exterior can remain attractive for years. Longevity depends on sun exposure, climate, preparation quality, coating choice, and maintenance. South- and west-facing walls often weather faster because they receive stronger sunlight. Inspect the finish periodically for chips, fading, mildew, and developing chalk. Wash the exterior gently when dirt begins accumulating. Small touch-ups are easier before coating failure spreads. Keep vegetation from rubbing against freshly painted walls. Also correct leaking gutters and recurring moisture problems near the exterior. Protecting the coating reduces avoidable wear.
Maintaining the Rest of Your Exterior
A fresh siding color can make neglected trim, gutters, landscaping, or hardscaping more noticeable. Treat repainting as one part of a broader exterior inspection. Small maintenance tasks can protect the finished appearance. Homeowners improving outdoor areas may also be planning patios, landscaping, or recreation spaces. Newsparq’s overview of swimming-pool planning and installation offers ideas for larger backyard projects. Coordinate major work before painting whenever construction could damage the new coating. Keep records of the paint brand, product line, sheen, and color formula. Store that information even if no paint remains. Accurate records make later repairs easier to match.
Frequently Asked Questions
Can you paint over old aluminum siding?
Yes, if the existing surface remains sound and properly prepared. Clean away dirt and chalk before evaluating the old coating. Scrape loose sections and prime exposed metal where required.
Do you always need primer before painting?
Not every previously coated wall needs complete priming. Bare metal, repaired areas, and heavily weathered sections usually need a compatible primer. Follow the selected coating manufacturer’s system recommendations.
What paint works best for exterior aluminum?
Quality 100% acrylic exterior paint is commonly recommended after correct preparation. Choose a product suitable for the substrate and local weather conditions. Confirm compatibility with any primer used underneath.
Is pressure washing safe?
Gentle washing can work, but excessive pressure creates risks. Strong streams can dent panels or force water behind overlapping courses. A hose and soft brush offer more control for many homeowners.
Is repainting aluminum siding worth doing?
Repainting aluminum siding is often worthwhile when the panels remain sound but look faded or dated. Preparation quality has a major effect on the finished result. Replacement makes more sense when damage or installation problems are widespread.
Can I paint a pre-1978 house myself?
Homeowners can perform many projects themselves, but older coatings require extra caution. EPA recommends lead-safe practices when disturbing paint in pre-1978 homes. Consider professional testing or a lead-safe contractor before sanding questionable coatings.
Final Steps Before You Start
Inspect the siding carefully before committing to paint. A clean, stable exterior with repairable damage is usually a better repaint candidate. Extensive failure may justify pricing replacement before buying supplies. Choose compatible products as a complete coating system rather than mixing random primer and paint. Schedule the work around dry, moderate weather. Give every cleaning, repair, primer, and finish stage enough time. Good preparation is what separates a durable finish from early peeling. Treat the cleaning and repair stages as part of the paint job. That approach gives your home’s exterior the strongest chance of looking clean for years. —